Add Your First Application
Once you're signed in, adding an application takes less than a minute. This guide walks you through creating, viewing, and updating a tracked application.
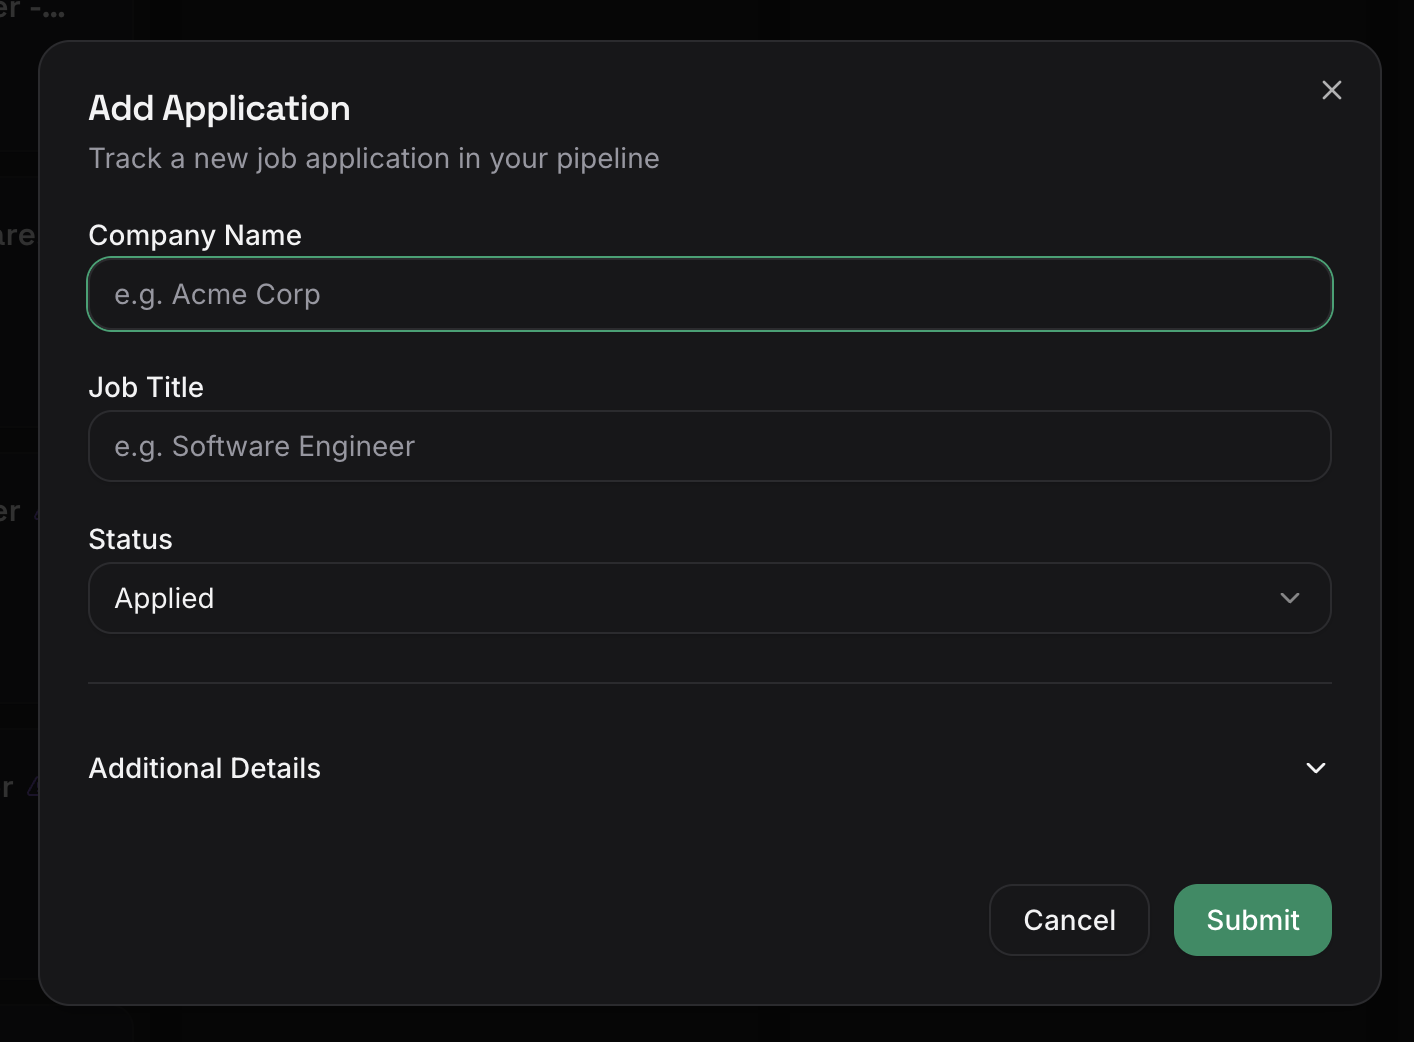
Create a New Application
- From the dashboard or the Applications page, click Add Application in the top-right corner.
- Fill in the details:
- Job title — The role you're applying for
- Company — Start typing to match an existing company or create a new one
- Job posting URL (optional) — Link to the original listing for easy reference
- Location — Remote, hybrid, or a specific city
- Salary range (optional) — Expected or listed compensation
- Status — Defaults to "Applied"
- Click Save.
Your application now appears on the Kanban board under the selected status column.
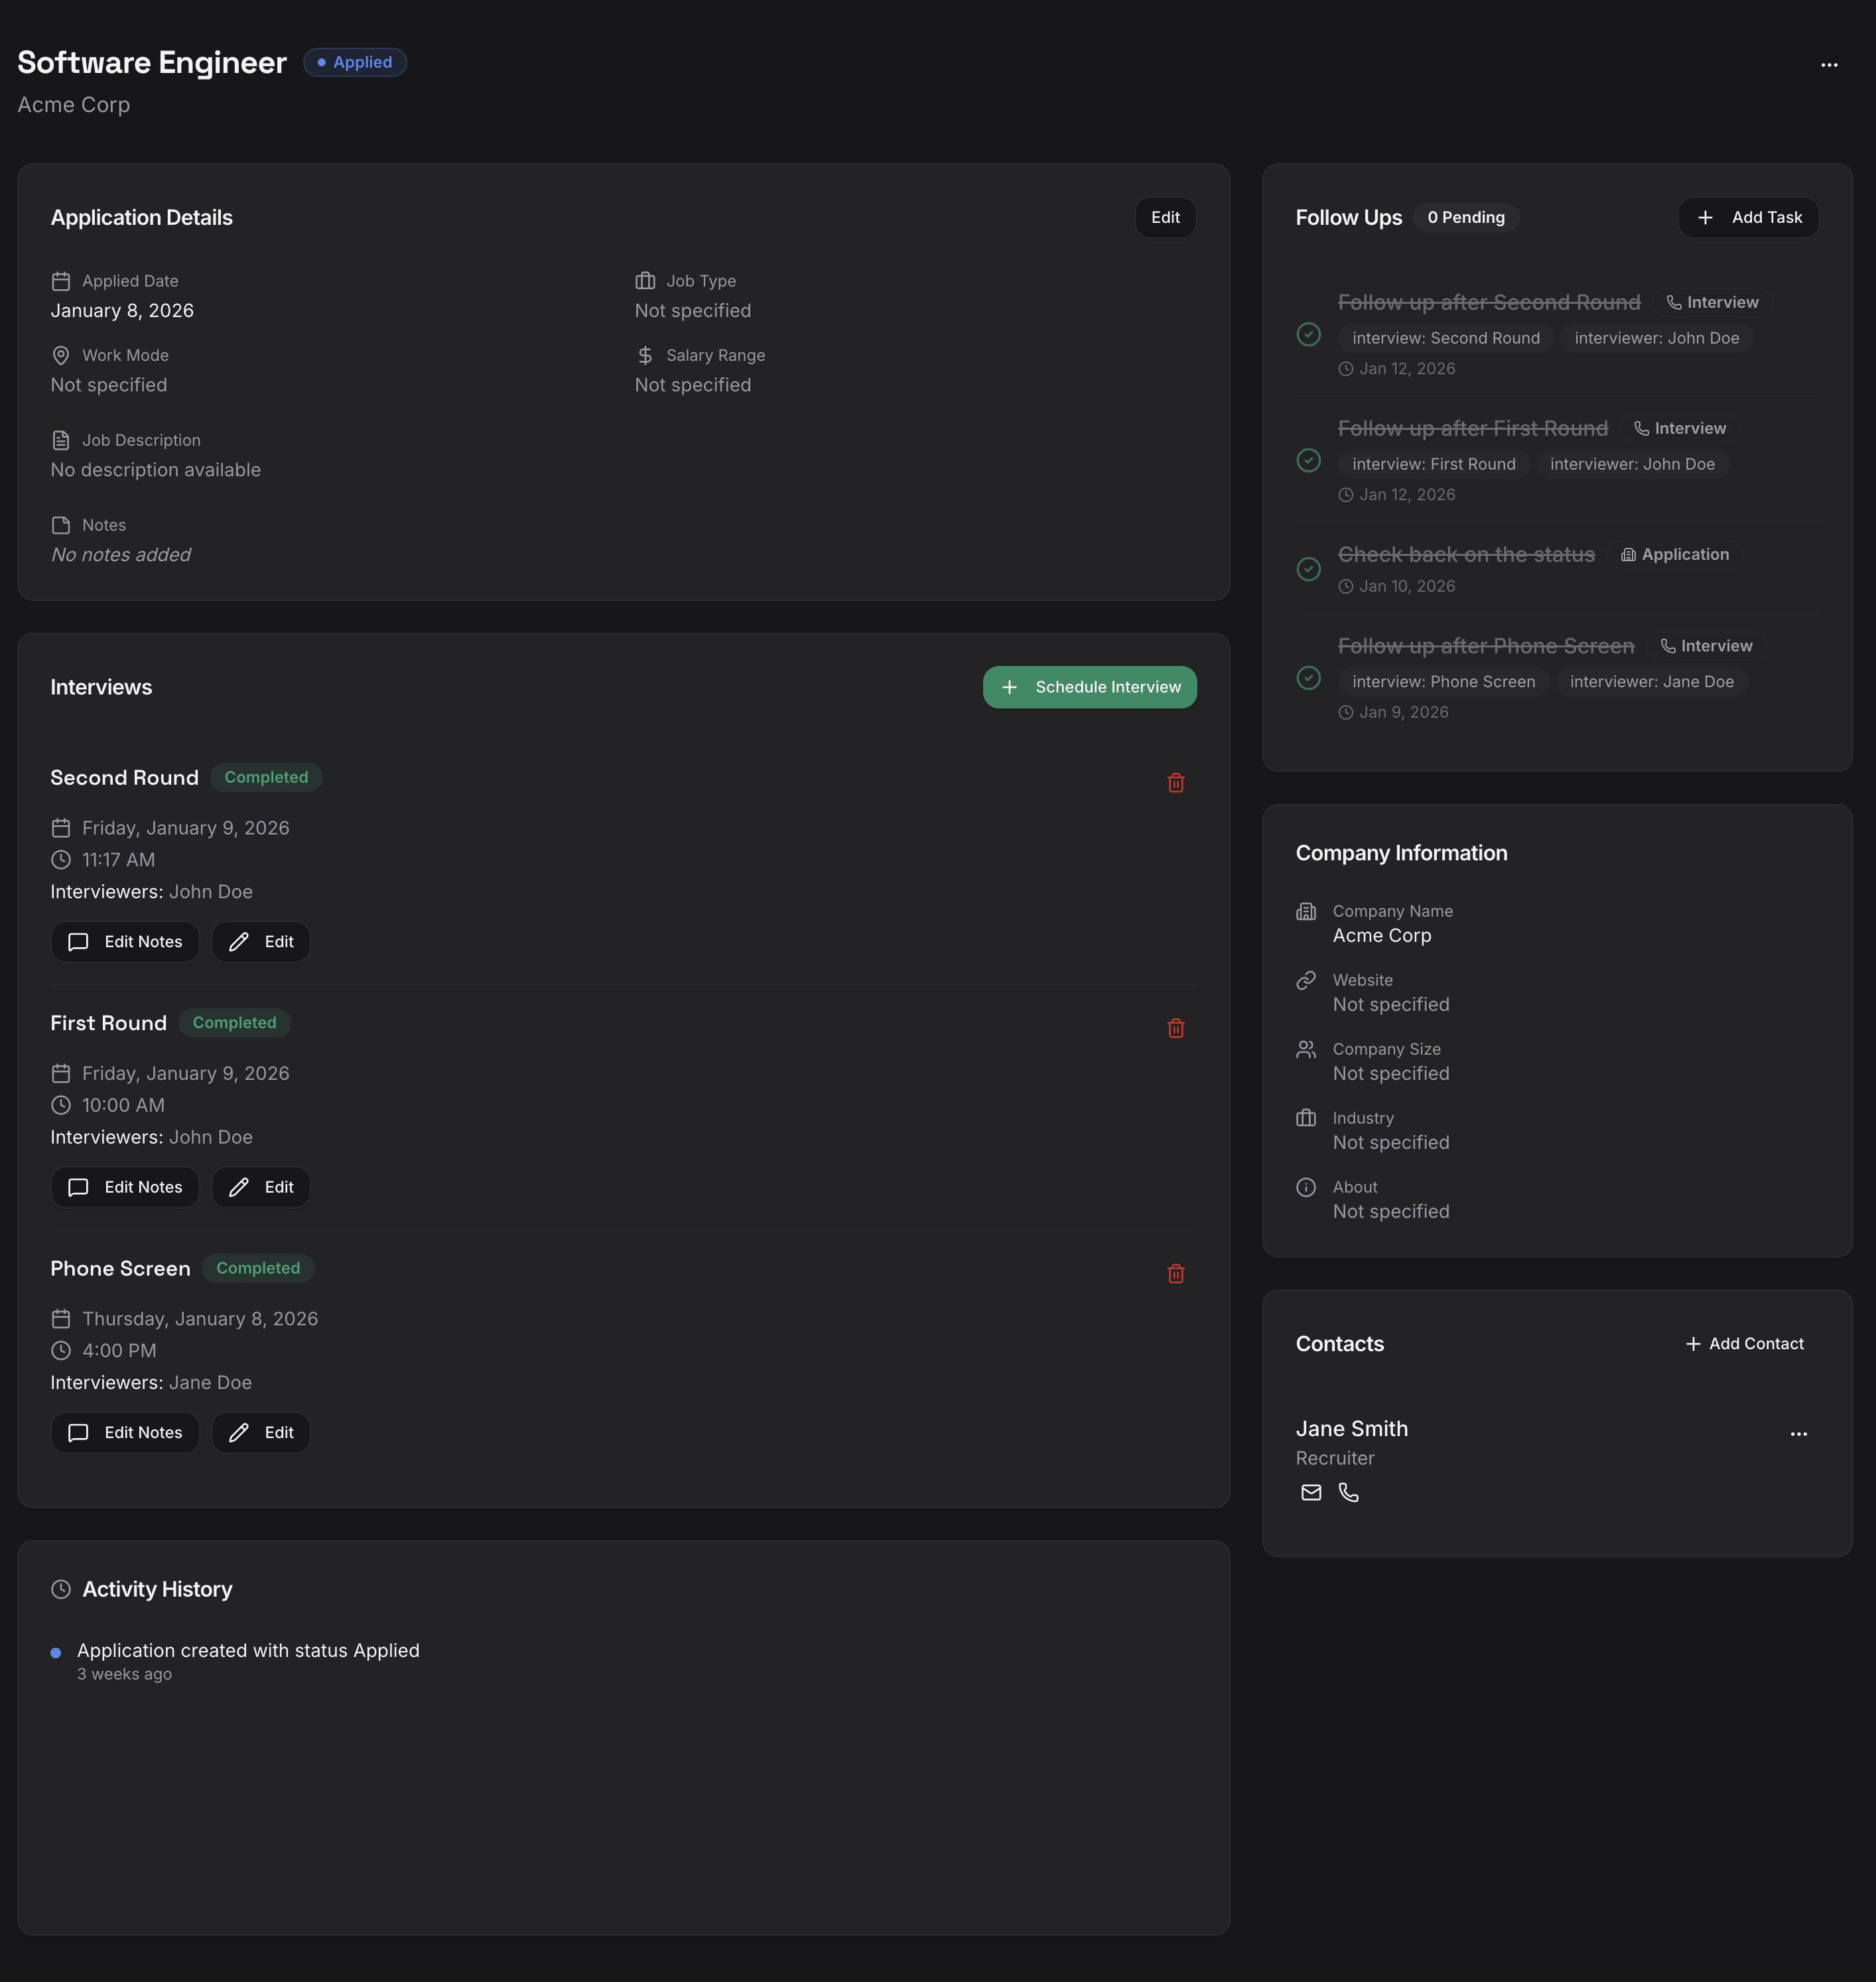
View Application Details
Click any application on the board or in list view to open its detail page. The detail view shows:
- Status and current stage — Where the application stands in your pipeline
- Company and role info — Title, location, salary range, and posting URL
- Timeline — A chronological log of status changes, notes, and interviews
- Linked contacts — Recruiters, hiring managers, and referrals associated with this role
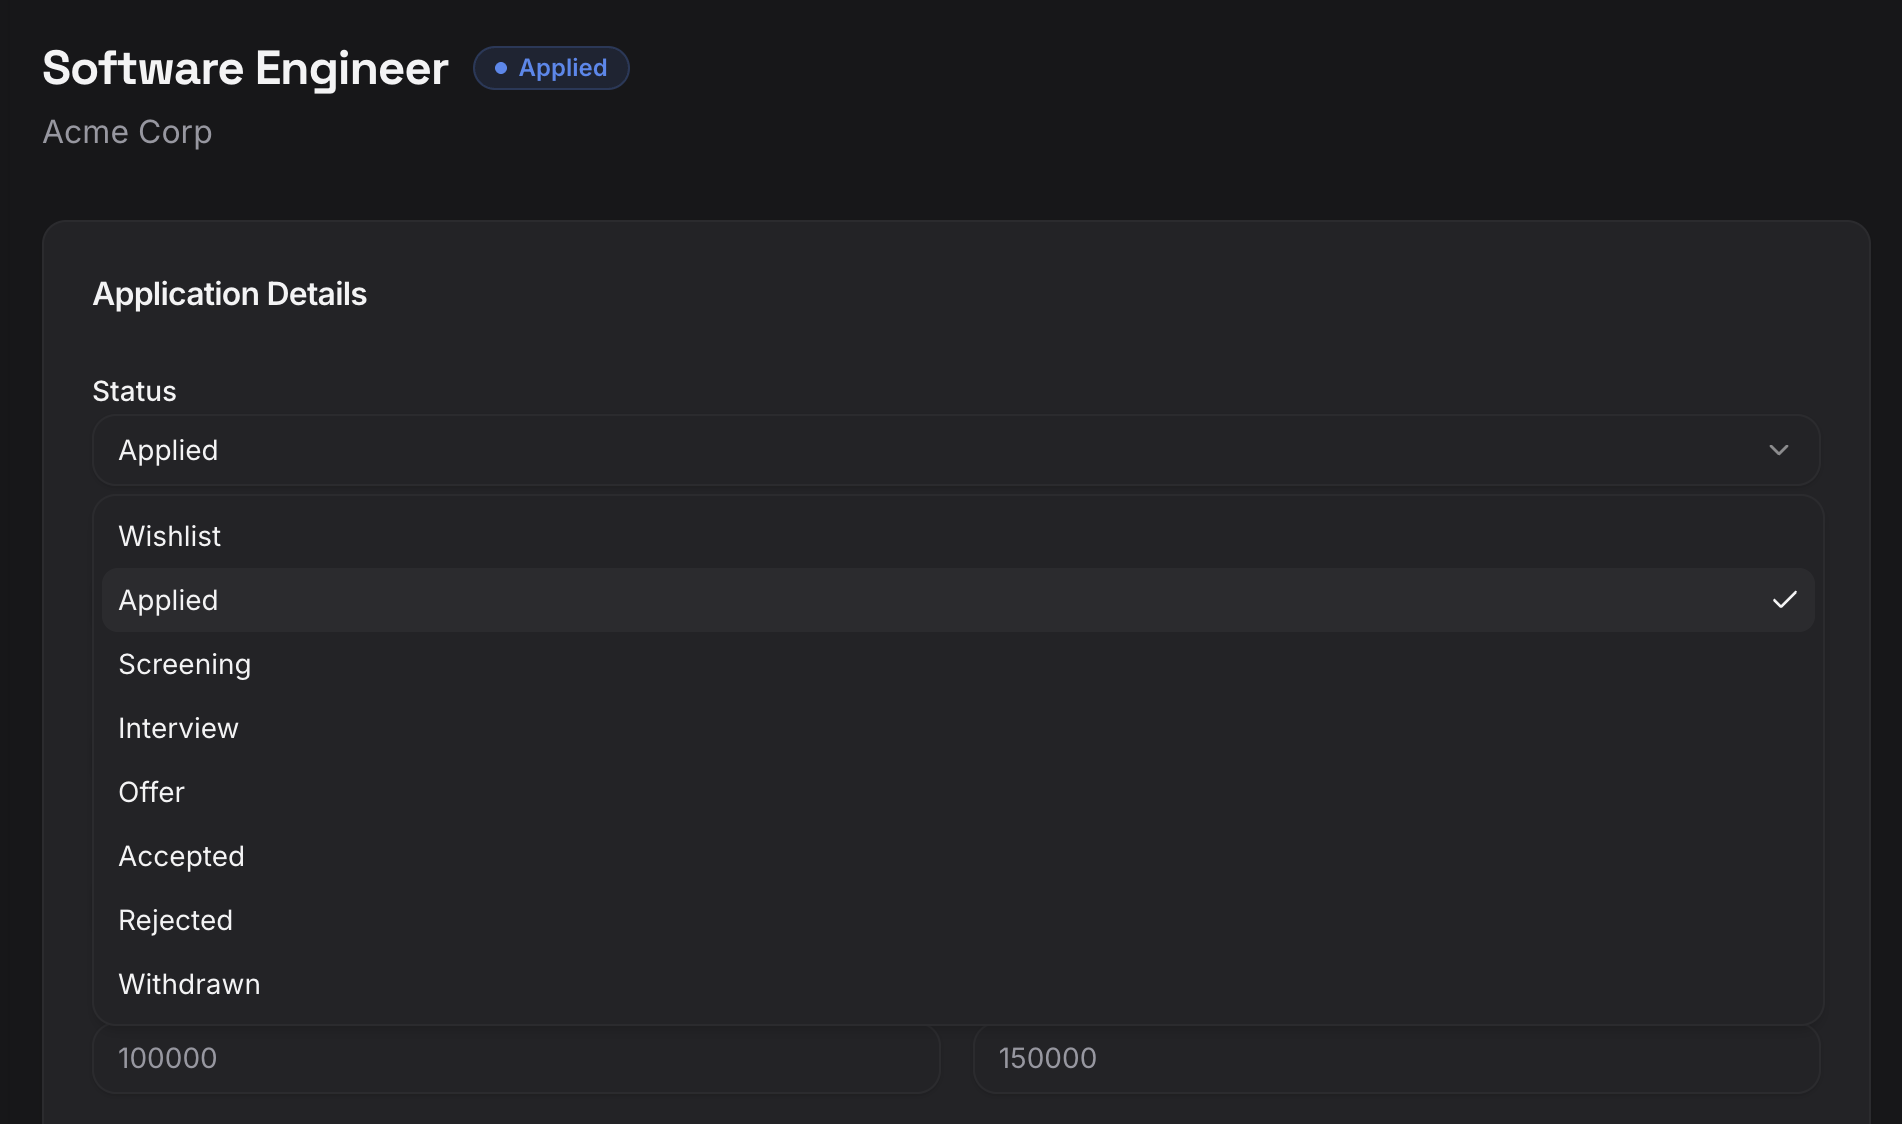
Update Your Application Status
As your application progresses, update its status to keep your pipeline accurate.
- Open the application detail page.
- Select a new status from the dropdown.
- JobHawk logs the change in your timeline automatically.
The available statuses are:
| Status | Meaning |
|---|---|
| Applied | You've submitted your application |
| Screening | Recruiter screen or initial phone call |
| Interview | Active interview process |
| Offer | You've received an offer |
| Closed | Terminal state — accepted, rejected, or withdrawn |
Tip
You can also drag application cards between columns on the Kanban board. See Understanding the Kanban Board for details.
Add Notes
Notes help you track details about each application — prep thoughts, conversation takeaways, or action items.
- Open an application and scroll to the Notes section.
- Click Add Note.
- Write your note and click Save.
Notes are timestamped and appear in the application's timeline alongside status changes and other events.
Next Step
Now that you're tracking an application, let's look at how the Kanban board helps you manage multiple applications at once.